Tony Posted January 1, 2018 Author Report Share Posted January 1, 2018 Seats and rails set aside until more additions become available i decided to open Pandora's box today to see if the new rear Ferrari engine viewing window fits..... ( imagine the background £175 gulp ) First action was to remove the plexi glass window and one of the side vents The new glass is already in place at this point, note the fit Should anyone say the glass is fake i rest my case After much relief most anxiety was belayed that being the fit, the height of the fit, the clearance between the engine and the glass since the new glass wasn't raised on anchor points.Needless to say it was perfect apart from one point? The new "correct" glass is not tinted at the top so the fake engine is to small now I kind of knew this would happen so I've researched a new bigger engine or i might matt black the upper area under the glass to hide the area.. I don't know for now? Quote Link to comment Share on other sites More sharing options...
liner33 Posted January 2, 2018 Report Share Posted January 2, 2018 get some window tinting film applied to the inside Quote Link to comment Share on other sites More sharing options...
Rich Posted January 2, 2018 Report Share Posted January 2, 2018 Good idea, that'll be cheap and easy to do. Quote Link to comment Share on other sites More sharing options...
Tony Posted January 2, 2018 Author Report Share Posted January 2, 2018 I agree but I'm going full circle and belittling the OEM glass by masking the engine bay. I think i need to either get a full size engine or put the now visible area in the shade. Quote Link to comment Share on other sites More sharing options...
Tony Posted January 7, 2018 Author Report Share Posted January 7, 2018 Plonker alert.... After the last hole drilled in the seat rail which took me two hours i decided to get some no messing around carbide bits... I started with a 3mm pilot hole and it was really struggling so i tried a new 4mm and a 5mm and they were all crap... So there i was thinking i had been done over i realised what was wrong... My new'ish drill was set on reverse .... I didn't even know it had reverse Quote Link to comment Share on other sites More sharing options...
P4UL T Posted January 7, 2018 Report Share Posted January 7, 2018 Ha ha , brilliant Quote Link to comment Share on other sites More sharing options...
Tony Posted January 7, 2018 Author Report Share Posted January 7, 2018 It could only happen to me Quote Link to comment Share on other sites More sharing options...
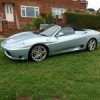
Tony Posted January 8, 2018 Author Report Share Posted January 8, 2018 Having learnt how to use my drill correctly the drivers seat is now fitted to the rail. Annoyingly i can't fit it in the car until the leather handbrake and gear change covers arrive.... Not sure the seat will fit in La Ferrari on the right Quote Link to comment Share on other sites More sharing options...
Rich Posted January 8, 2018 Report Share Posted January 8, 2018 Haven't drills always had a reverse? Mine have Seat looks good but why can't you fit it now? Quote Link to comment Share on other sites More sharing options...
Tony Posted January 8, 2018 Author Report Share Posted January 8, 2018 Because the centre consul is out waiting for the leather trim to arrive.... All my past drills had reverse but on this one the button is very small and high on the handle so i didn't notice it. Quote Link to comment Share on other sites More sharing options...
eddie Posted January 8, 2018 Report Share Posted January 8, 2018 Seats look really good - gonna be fun to drive in spring and summer when the weather gets better Whwere did you get that battery booster from Tony? Quote Link to comment Share on other sites More sharing options...
Tony Posted January 8, 2018 Author Report Share Posted January 8, 2018 Yep I'm looking forward to some better weather hence the reason I'm trying to get things done now. My leather bits should be here tomorrow plus I'm going to get the paint mixed this week... The booster i got from Amazon and it's one of the best things I've bought for ages.. I would say it's fully charged in 15min and with that it started a car and a van at work and my car and it only used 15% of it's power. It also charges your phone and it's a touch or a red/ blue strobe light same as the emergency services. Quote Link to comment Share on other sites More sharing options...
Viking Posted January 8, 2018 Report Share Posted January 8, 2018 I bought one, as the Yeti has struggled to start occasionally in the mornings (needs a new battery but it's getting traded shortly). Used it on the Yeti a few days ago and it started it fine (2.0ltr diesel). Mother in Laws Polo Dune has stood for about 3 months as she's away, so I went to start it. Battery virtually dead so I used the booster. Killed the booster in 5 seconds and still didn't start the car. I guess there's no substitute for a good sized booster pack rather than a small battery pack trying to act like a big boy, but for the odd cold start issue I think it's okay. Quote Link to comment Share on other sites More sharing options...
Tony Posted January 9, 2018 Author Report Share Posted January 9, 2018 Is there a difference between boost and jump start? Quote Link to comment Share on other sites More sharing options...
Rich Posted January 9, 2018 Report Share Posted January 9, 2018 All jump starters will only really work on batteries that have lost a bit of charge and don't have enough juice to turn the engine. If it's that flat it's draining the jump starter it needs a proper charge. Sometimes I leave the MX5 for a few weeks without realising and it only just catches when I next use it. I really need to use it once a week and take it on a run. Quote Link to comment Share on other sites More sharing options...
Tony Posted January 13, 2018 Author Report Share Posted January 13, 2018 It doesn't look like I'm going to be able to get a bigger engine so I've decided to finish the matt black around the engine, lacquer the engine one last time and sound deaden with silver foam blocks all the area's around the engine and under the side vents. Once done the OEM glass can be fitted in it's final position. I've also got all the cabin leather now ( images to follow ) and since I cannot find a six speed H-gate gear plate to fit I'm going to back away from that, same can be said for the quick shift gear change. Quote Link to comment Share on other sites More sharing options...
Tony Posted January 14, 2018 Author Report Share Posted January 14, 2018 Both seats in and fitted perfectly. Can't say I'm anything but impressed with the seat rails, ok i got mugged on the cost but they are really well made and a perfect fit. Next move is to fit the leather on the handbrake and gear stick and I'm still in two minds about the seat belts. Use the OEM belts or fit a harness which would work better with the seats but the 360 didn't have harness's so what i gain in one move i lose in another? Quote Link to comment Share on other sites More sharing options...
SMARTLY Posted January 14, 2018 Report Share Posted January 14, 2018 You can't move in a harness. Have you put a cover under where the glass is going to go over the engine? Quote Link to comment Share on other sites More sharing options...
Tony Posted January 14, 2018 Author Report Share Posted January 14, 2018 No cover other than the engine under the glass.... Maybe i could use one side of the seat and the OEM belt. Quote Link to comment Share on other sites More sharing options...
Tony Posted January 15, 2018 Author Report Share Posted January 15, 2018 Just as I've made alternate efforts due to availability I found what i need. H-gate If turned over will work....Reverse left-forward then six speed. Then a full size engine cover That image is for a F430 but the glass and engine are the same. Quote Link to comment Share on other sites More sharing options...
Tony Posted January 16, 2018 Author Report Share Posted January 16, 2018 Moving on..... Today i took a car part to Eurocolour who matched the colour, so i bought 1x undercoat 1x clearcoat 2 x California blue paint, 1 x masking paper. I decided to use spray this time on the cracked window surround but for future jobs like the door shuts which are currently a flat blue I'll be using this.. Adjustable nozzle provides three different types of spray pattern including vertical, horizontal and circular. make you get the job quickly done and with the best even coverage. HVLP design atomises the paint so that it clings to the surface being painted and will not bounce back, ideal for thin, free flowing paints. Variable flow trigger to control paint flow. Quick refill lid can help you add paint quickly. The sprayer can be detached to three units, which is easy to wash. Lightweight and efficient, you can quickly move from job to job. Edges, corners and broad interior surfaces can be sprayed faster. You are saved from the tedious efforts of a brush. Widely use for car parts, home appliance parts, steel furniture, wooden products and so on, great for finishing deck railings, lawn furniture, playsets, grills, kids furniture, and more. it is an ideal tool for your DIY work In addition in the image i have the seat buckle leather surround on and some 7/16th UNF nuts needed to bolt the buckle to the seats. Also in the image is the silver sound proofing i will use the line around the engine bay under the vents and more importantly above the current engine that will be visible with the new glass. Quote Link to comment Share on other sites More sharing options...
SMARTLY Posted January 16, 2018 Report Share Posted January 16, 2018 Did you ever get that panel mended at the front wing / windscreen? Quote Link to comment Share on other sites More sharing options...
liner33 Posted January 16, 2018 Report Share Posted January 16, 2018 Dont think an electric gun will be good enough for paintwork , more for sheds and plastic dip so i understand So what are your plans for the seat belts ? Fabricate extensions for the clip or harnesses? Quote Link to comment Share on other sites More sharing options...
Tony Posted January 16, 2018 Author Report Share Posted January 16, 2018 It's the windscreen pillar i broke is what the spray paint is for. Liner the spray gun has three settings and it atomises the paint. It also says "car parts" which is all i intend to use it for. As for the belts i only got the correct nuts today so i need to fit the buckle and see how the belt fits over the seats and occupants. Quote Link to comment Share on other sites More sharing options...
Viking Posted January 16, 2018 Report Share Posted January 16, 2018 It's the windscreen pillar i broke is what the spray paint is for. Liner the spray gun has three settings and it atomises the paint. It also says "car parts" which is all i intend to use it for. As for the belts i only got the correct nuts today so i need to fit the buckle and see how the belt fits over the seats and occupants. I agree with Liner. Just because it says "Car parts" doesn't mean it's going to be any good for spray finishing. Just take a look in any bodyshop and see how many of them are using £30 electric spray guns which aren't up to the job. Compare your electric gun with a 2.5mm nozzle to this pro spray gun with 1.3 and 1.4mm nozzles. https://www.amazon.co.uk/dp/B0787QCJWL Quote Link to comment Share on other sites More sharing options...

Recommended Posts
Join the conversation
You can post now and register later. If you have an account, sign in now to post with your account.