Invisible Touch Detailing Posted May 18, 2012 Report Share Posted May 18, 2012 Here we have Jamesy's writeup for his newely acquired Do Luck Supra! The car was booked in for a Stage 1 paint enhancement, so not all defects will be removed in this process. As a general rule original Supra paint is quite soft, as this car has been fully painted it was a little unknown what the paint hardness would be like. I can tell you now, that its much harder So, taking a walk around the car lets see what weve got... Quote Link to comment Share on other sites More sharing options...
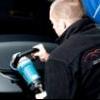
Invisible Touch Detailing Posted May 18, 2012 Author Report Share Posted May 18, 2012 Starting off, the tyres were cleaned with All Purpose Cleaner Wheels with Bilberry, which is safe for all types of alloys, including chrome Calipers also cleaned with APC All door, boot, fuel shuts, window trim, lights and scuttle panel cleaned with APC Quote Link to comment Share on other sites More sharing options...
Invisible Touch Detailing Posted May 18, 2012 Author Report Share Posted May 18, 2012 The car was then jetwashed, snowfoamed, rinsed off after 5 mins and washed using Shampoo Plus, leaving this Being a mild day outside, the car was clayed using Last Touch as lube to remove bonded contamination washing would not remove The rear number plate was cleaned with Tar & Glue to remove the residue from a previous plate applied over the top After being washed again the car was taken inside to be dried and inspected, lots of swirls and faded paint was now very apparent Quote Link to comment Share on other sites More sharing options...
Invisible Touch Detailing Posted May 18, 2012 Author Report Share Posted May 18, 2012 Quote Link to comment Share on other sites More sharing options...
Invisible Touch Detailing Posted May 18, 2012 Author Report Share Posted May 18, 2012 Paint thickness readings were taken. Obviously being painted the levels were noticeably higher than you would expect for original paint I chose to use Meguiars M205 polish, a 3M polishing pad and backing plate and the Makita rotary. Each panel required 2 hits of this process to achieve the results i wanted the car to leave with for a stage 1 treatment. The defects remaining would require a step up in compound to remove, which would need a stage 2 correction treatment. As the defects that remained had the edges taken off them during the process applied here, this hugely changes the way natural light hits them, and as you will see as the car develops, this will still leave an exquisite finish to the vehicle Starting on the front wing Quote Link to comment Share on other sites More sharing options...
Invisible Touch Detailing Posted May 18, 2012 Author Report Share Posted May 18, 2012 Moving onto the door The rear wing The blades of the carbon spoiler had to be removed to allow the machine full access Moving round to the other side Quote Link to comment Share on other sites More sharing options...
Invisible Touch Detailing Posted May 18, 2012 Author Report Share Posted May 18, 2012 Onto the passenger door Polished side under LED light Unpolished side Passenger front wing had some lovely defects clearly visible Round to the bonnet and then front bumper Quote Link to comment Share on other sites More sharing options...
Invisible Touch Detailing Posted May 18, 2012 Author Report Share Posted May 18, 2012 Then the A pillars and roof The carbon spoiler was also machined Once all polishing was complete, and all panels had been IPA'd to remove polishing oils, out came the box of Do Luck stickers to return the original graphics the car was known for. Each sticker location was carefully checked to its original place The glass was then cleaned using 3M Glass Cleaner The exhaust was polished inside and out Swissvax Cleaner Fluid was then applied by hand to the paint to prepare it for the wax application The chosen wax, was Swissvax Best of Show. Applied in a thin layer and buffed off after 15 mins Quote Link to comment Share on other sites More sharing options...
Invisible Touch Detailing Posted May 18, 2012 Author Report Share Posted May 18, 2012 The wheels, although really requiring a refurb, were polished up with NXT, ipa'd and sealed with Poorboys. Tyres were dressed with Endurance Gel The boot was hoovered and everything cleaned with APC The interior was hoovered and dusted down These were the final pictures after window seals and scuttle panel treated with Bumper Care Quote Link to comment Share on other sites More sharing options...
Invisible Touch Detailing Posted May 18, 2012 Author Report Share Posted May 18, 2012 Quote Link to comment Share on other sites More sharing options...
Invisible Touch Detailing Posted May 18, 2012 Author Report Share Posted May 18, 2012 Finally the car was wrapped under a sheet to await Jamesy's arrival When he came, we both applied the Do Luck sunstrip, as best we could This wasnt an easy task! These were the final pictures as the car was pulled outside to leave Quote Link to comment Share on other sites More sharing options...
Invisible Touch Detailing Posted May 18, 2012 Author Report Share Posted May 18, 2012 It was a great pleasure, to work on the Do Luck Supra, and for Jamesy. He's a fantastic guy that will do the car proud, for us all to appreciate back in UK events. Thanks for reading, Christian Quote Link to comment Share on other sites More sharing options...
Tony Posted May 18, 2012 Report Share Posted May 18, 2012 Jebus have they been using a Brillo pad on the paint Absolutely stunning work there as usual, the 50/50 picture is brilliant. Quote Link to comment Share on other sites More sharing options...
Invisible Touch Detailing Posted May 18, 2012 Author Report Share Posted May 18, 2012 Cheers Tony New owner has been given some good tuition on maintanance and products Quote Link to comment Share on other sites More sharing options...

Recommended Posts
Join the conversation
You can post now and register later. If you have an account, sign in now to post with your account.