Tony Posted May 7, 2018 Author Report Share Posted May 7, 2018 NS all done and painted....Loads of hassle with the jacks and heat but that's it... Downside and there has to be a downside, i snapped one of the wheel studs but I'll deal with that another day. Quote Link to comment Share on other sites More sharing options...
Rich Posted May 7, 2018 Report Share Posted May 7, 2018 Wouldn't it have been easier to remove the brake parts at work and taken them home to paint? They are just covers so you can still drive the car? Quote Link to comment Share on other sites More sharing options...
Tony Posted May 8, 2018 Author Report Share Posted May 8, 2018 Fitting it in between jobs would have been a pain, it took me most of the day as it was, Quote Link to comment Share on other sites More sharing options...
Tony Posted May 8, 2018 Author Report Share Posted May 8, 2018 Today was wax and polish....In the heat it wasn't a pleasure but i was compelled to do it.... Tomorrow i'm going to re-dye the soft top then seal it again.. I'm a little nervous about doing it but I'll be mad not to do it since i have all the dye's and so on. Quote Link to comment Share on other sites More sharing options...
Tony Posted May 10, 2018 Author Report Share Posted May 10, 2018 Calipers painted and decal As some know the correct F360 glass is more clear than the replica glass so after much prating about trying to hide where the engine stops and the boxed area it's in. So i decided to tint the upper 1/3....For once it actually went well.. Quote Link to comment Share on other sites More sharing options...
Rich Posted May 10, 2018 Report Share Posted May 10, 2018 Looking good It's much better with the tint now. Quote Link to comment Share on other sites More sharing options...
Tony Posted May 10, 2018 Author Report Share Posted May 10, 2018 Thanks...... It seemed the best way to hide the blank area above the engine, and trust me i've tried many things... Also today i've changed the Ferrari logo's on the wheels centre caps since the old one's had faded. Quote Link to comment Share on other sites More sharing options...
liner33 Posted May 11, 2018 Report Share Posted May 11, 2018 Didnt i suggest window tint ages back ? Quote Link to comment Share on other sites More sharing options...
Tony Posted May 11, 2018 Author Report Share Posted May 11, 2018 Actually yes you did ....I had visions the join on the outside of the glass would look obvious, i was wrong... Even if you rub your finger over it you can barely feel it. Quote Link to comment Share on other sites More sharing options...
Tony Posted May 14, 2018 Author Report Share Posted May 14, 2018 Rear compartment doors now lined with the new leather style and speakers fitted, amp is in the compartment. Quote Link to comment Share on other sites More sharing options...
Rich Posted May 14, 2018 Report Share Posted May 14, 2018 Looks good, have you bought more speakers? Quote Link to comment Share on other sites More sharing options...
Tony Posted May 14, 2018 Author Report Share Posted May 14, 2018 Yeah, i sent the others back... Believe it or not i totally forgot i could use the compartment doors??... The amp is set with about a 40/ 60 split between the front and rear speakers. The 40% is just under the distortion window for the fronts. Quote Link to comment Share on other sites More sharing options...
liner33 Posted May 15, 2018 Report Share Posted May 15, 2018 That looks ok , how does it sound ? I did my sons C1 a few weekends back , new front speakers and then made a rear parcel shelf out of MDF and audio cloth to mount 2 x 6x9's , along with a new headunit , he is thrilled Quote Link to comment Share on other sites More sharing options...
Tony Posted May 15, 2018 Author Report Share Posted May 15, 2018 Sounds amazing, the sort of sound you feel in your back. I still have to play with the front/ rear balance but that's another day. Quote Link to comment Share on other sites More sharing options...
Tony Posted May 27, 2018 Author Report Share Posted May 27, 2018 As some may know i hit the NSR on a fence post trying to avoid the poxy cat...Luck or not it left some deep scratches... So I've decided to repair it myself..First the fill and sanding Once done i used a wax and oil remover the sprayed the etch undercoat I'm going to give that a day to dry, plus i'm worrying about rain today? Also i have sprayed the vent grills matt black I'm going to do the lower vent grills once i've dealt with the rear wing..... If this all goes well i'm going to repair, fill and spray the cracked window pillar, that way the bodyshop can stick their £1000 quote up their arse. Quote Link to comment Share on other sites More sharing options...
Tony Posted May 29, 2018 Author Report Share Posted May 29, 2018 I finely wet & dried the colour coat and it was clear the paint shade was wrong ..... All i could do now was to sand the colour coat down to the primer and then add one coat of gell..... Gutted i spent a few hours online and i believe i've found the correct Ferrari paint code. This i'm going to get mixed tomorrow. In summary it's been a wast of time and money but at least it's lead me to the correct code " i think". Quote Link to comment Share on other sites More sharing options...
Rich Posted May 30, 2018 Report Share Posted May 30, 2018 Has the car definitely been sprayed in a genuine Ferrari colour? Quote Link to comment Share on other sites More sharing options...
Tony Posted May 30, 2018 Author Report Share Posted May 30, 2018 Yes...It's Azzurro California 524, 2003 Ferrari F360 spyder... I ggogled the code and it showed the same car and colour as mine. Quote Link to comment Share on other sites More sharing options...
liner33 Posted May 31, 2018 Report Share Posted May 31, 2018 Its a custom paint job though , not factory paint, you will never match it yourself you will need a professional to play around with the colour , this is where the true skill of a painter comes in Quote Link to comment Share on other sites More sharing options...
Tony Posted May 31, 2018 Author Report Share Posted May 31, 2018 That may be so but if i can find the colour then I'll do it myself. The Azzurro California 524 paint i had mixed today and it's wrong ( to dark ) so i'll check again because there was other blue Ferrari colours for the 360's year 2003 Quote Link to comment Share on other sites More sharing options...
Tony Posted May 31, 2018 Author Report Share Posted May 31, 2018 I think I've found another colour "Argentina Nurburgring silver 101 Quote Link to comment Share on other sites More sharing options...
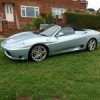
Tony Posted May 31, 2018 Author Report Share Posted May 31, 2018 Also i have California Blue Pearl Compared to mine Quote Link to comment Share on other sites More sharing options...
SMARTLY Posted May 31, 2018 Report Share Posted May 31, 2018 Yours has no tint of blue so it can't be that can it? Quote Link to comment Share on other sites More sharing options...
Tony Posted May 31, 2018 Author Report Share Posted May 31, 2018 Mine is Pearl blue i think?....Definitely not metallic or pastel. Quote Link to comment Share on other sites More sharing options...
SMARTLY Posted June 1, 2018 Report Share Posted June 1, 2018 Did you not have paperwork with the car and it's build that might have stated the colour? Quote Link to comment Share on other sites More sharing options...

Recommended Posts
Join the conversation
You can post now and register later. If you have an account, sign in now to post with your account.